
Portable Dye Hood for Mixing Dyes
If you've watched my Weaving/Dyeing Demo I did as part of Nomad Yarn's Virtual Event for Roving Indiana, I mentioned that I would post some information about the portable dye hood that I use.
I worked in a shared studio space. My studiomate, Jean Haley, dyes with all natural dyes on wool for rughookers. I'm working with very concentrated MX dye powders, of which even one teensy speck of my superfine powders could potentially ruin one of her beautiful wool fabrics. Not to mention, superfine dye powders are NOT healthy to be ingesting/breathing in. I needed to come up with a solution that kept us both safe, kept my dye powders from landing where they didn't belong, and didn't take up too much of our shared space. For a while, that meant mixing powders outside.
Enter: The Benchtop Blast Cabinet!

My husband came up with the idea. A benchtop blast cabinet is small, but enclosed. It's designed to seal out blasting medium, and vacuum out dust. I'm not using it exactly as intended, but it's working out great. So this is what I put together:
- Benchtop Blast Cabinet from Harbor Freight (Don't forget to use a coupon if you can! They mail/email them out frequently.)
- A cart to roll it around on (mine is an old school cart I picked up cheap at the Indiana University Surplus Store)
- plexiglass cut to fit inside the box
- Small shop vac
- Duct tape
I found this great cart to roll my stuff around on. The shelf is essential, as it lets me store my dye powders right on the cart and gives me a place to put the shop vac. If portable isn't necessary, any table will do. My cart is a bit too tall, so I need a stool to see inside my cabinet to work.
(I took off the top shelf, and one of these days I'll remember to bring a hacksaw to cut off the unnecessary shelf arms...)
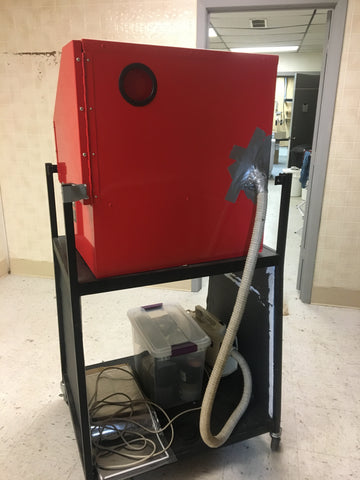
The shop vac is a cute little freebie I acquired. A lightweight shop vac is all I needed, nothing fancy, so this was perfect. I'm sure if I gave my husband the chance he'd come up with a much better attachment than a bunch of duct tape, but duct tape was the quick solution and it's working. I taped the hose into the back port and made sure it was as sealed as possible to create good suction. The hole at the top left stays uncovered for air flow.
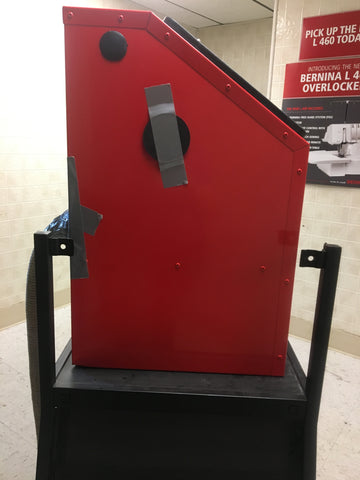
All other openings I closed with included covers, and if necessary, taped them on.
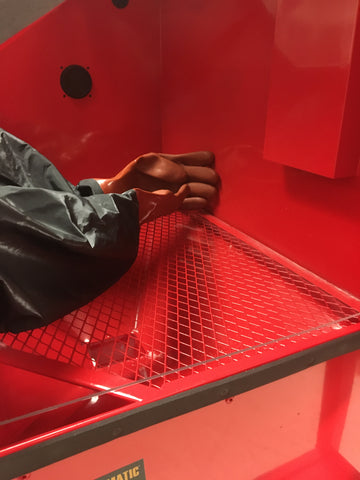
Inside the box there's a grate floor, which is designed to set sandblasting projects on but allow medium to fall through. Since I don't want dye powders falling into the depths of the box, I put a sheet of plexiglass on top of it. It makes it much easier to clean.
The sealed gloves came with the box already attached. I'll admit they're a bit thick and can be a bit difficult to use, but it allows you to work in a sealed environment. You could potentially remove them and use normal kitchen gloves, but you risk losing suction and open up a space for dye powder to escape. Still, if you kept the vacuum running the whole time you're working with dry powder, it would likely work out. I'm just being extra safe.
That's it in a nutshell! I didn't have to install any complex special ventilation in our studio, I don't have to plan on mixing dyes based on the weather and drag all my stuff up a flight of steps to do so (where there's also no sink), and I can wheel this into the back closet when not in use. I'm pretty happy with this solution!